How to notarize a document on the blockchain?
Document Notarization

T H Kwek
Last Update 4 years ago
Sign.net allows users to use blockchain as a neutral third party to prove the authenticity of your document. Now everyone can notarize documents on the blockchain with a few simple clicks.
What is a Document Checksum?
You can save a cryptographic checksum of your document on the blockchain. A cryptographic checksum is a mathematical value (called a checksum) that is assigned to the document. The blockchain serves as a neutral third party that stores the checksum.
How to notarize documents?
2-Minute Video Guide
Step-By-Step Guide
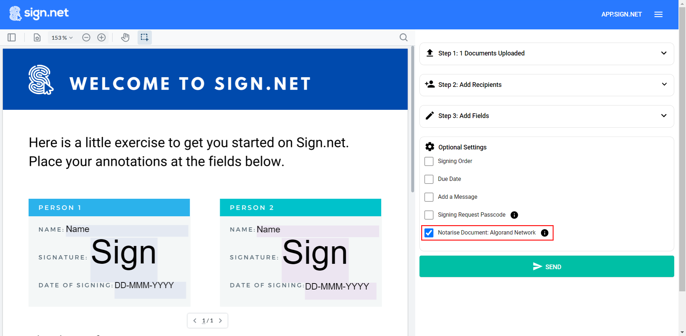
By default, the option to notarize your document is activated by default. You can toggle this on and off under Optional Settings while setting up your document on the document dashboard.
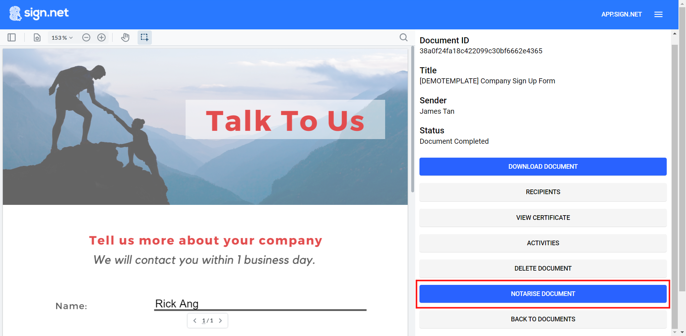
If you would like to notarize a completed document, from the Menu, click on Document. Next, go to the Filter By drop down menu and select Completed Document. Select your document and click on the button Notarize Document.
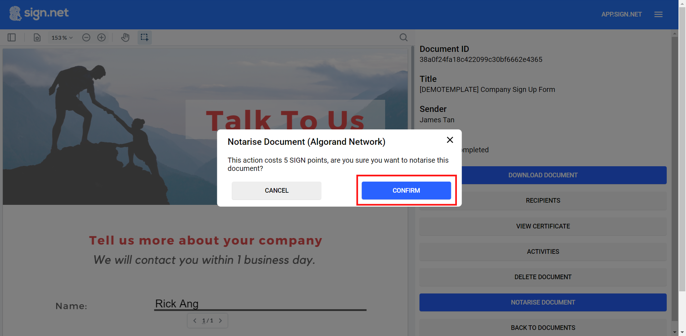
A pop up will appear asking you to confirm the notarization. Click Confirm to notarize the document.
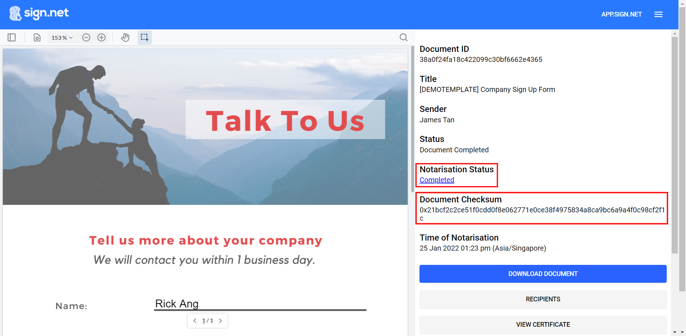
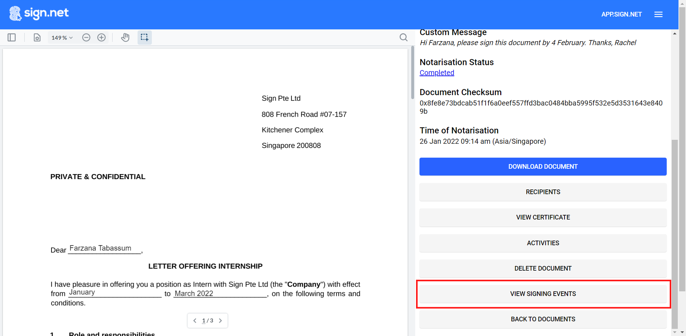
After the document is notarized, its Notarization Status and Document Checksum are available on Document Information. You can also view the transaction on the blockchain by clicking on Completed under Notarization Status.
Clicking on the button will bring you to the website, AlgoExplorer, where you can view details of the transaction.

Sign.net points
You will need to use Sign.net reward points to redeem for document notarization. You can choose to save your document on the Algorand Blockchain (costs 5 Sign.net Reward Points).
You can earn Sign.net reward points by verifying your account, sending documents for signing, and referring new users. You will continue to earn points when your referrals send documents too.
Verifying Checksum of the document
To verify the authenticity of the document you have on hand, simply perform the following steps:
1. Upload it to any third-party Checksum/Hash generator and select SHA 256. You can use this link: https://emn178.github.io/online-tools/sha256_checksum.html.
2. The system will generate the checksum of the document that you have on hand.
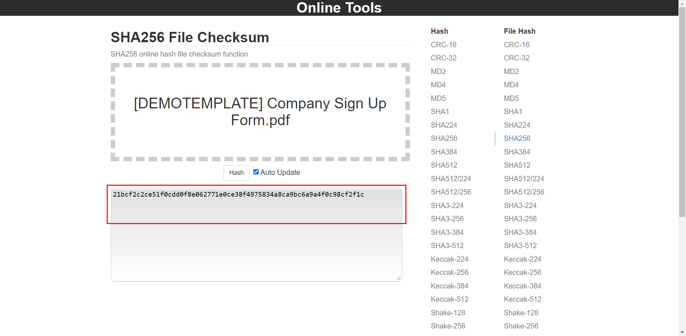
- If the Checksum matches, then this is the same document that was signed on Sign.net.
- If the Checksum doesn't match, then there has been changes to the original document.Compare this with the checksum that has been saved on the blockchain.
To view the signing timestamps, access your completed documents and click on View Signing Events.
A pop-up will appear, showing you the signers and giving you the option to view their signing timestamps on the blockchain. Click Completed to view the timestamps.
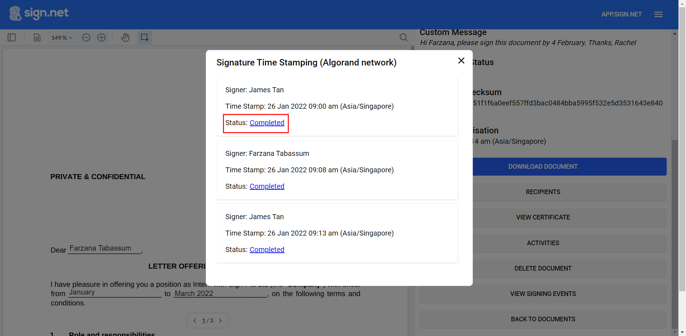
Clicking on the button will bring you to the website, AlgoExplorer, where you can view the blockchain details.
